Published Date: October 1, 2020 | Last Updated: October 22, 2025
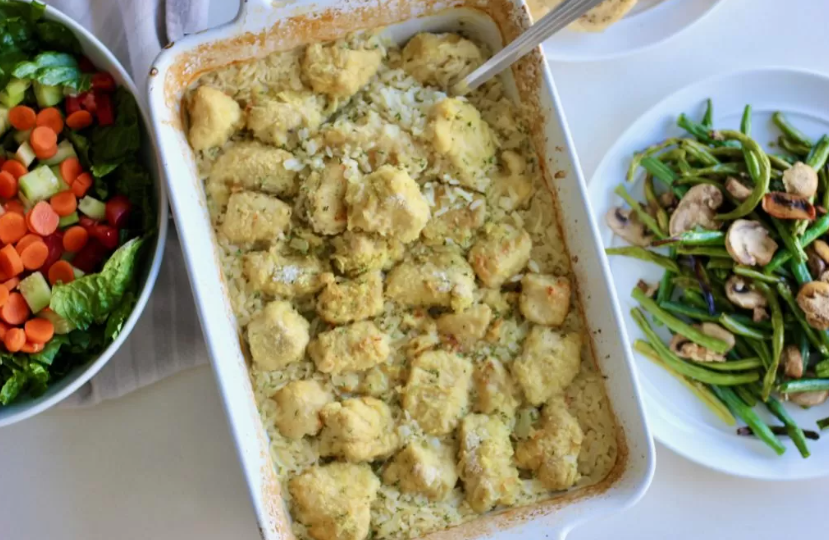
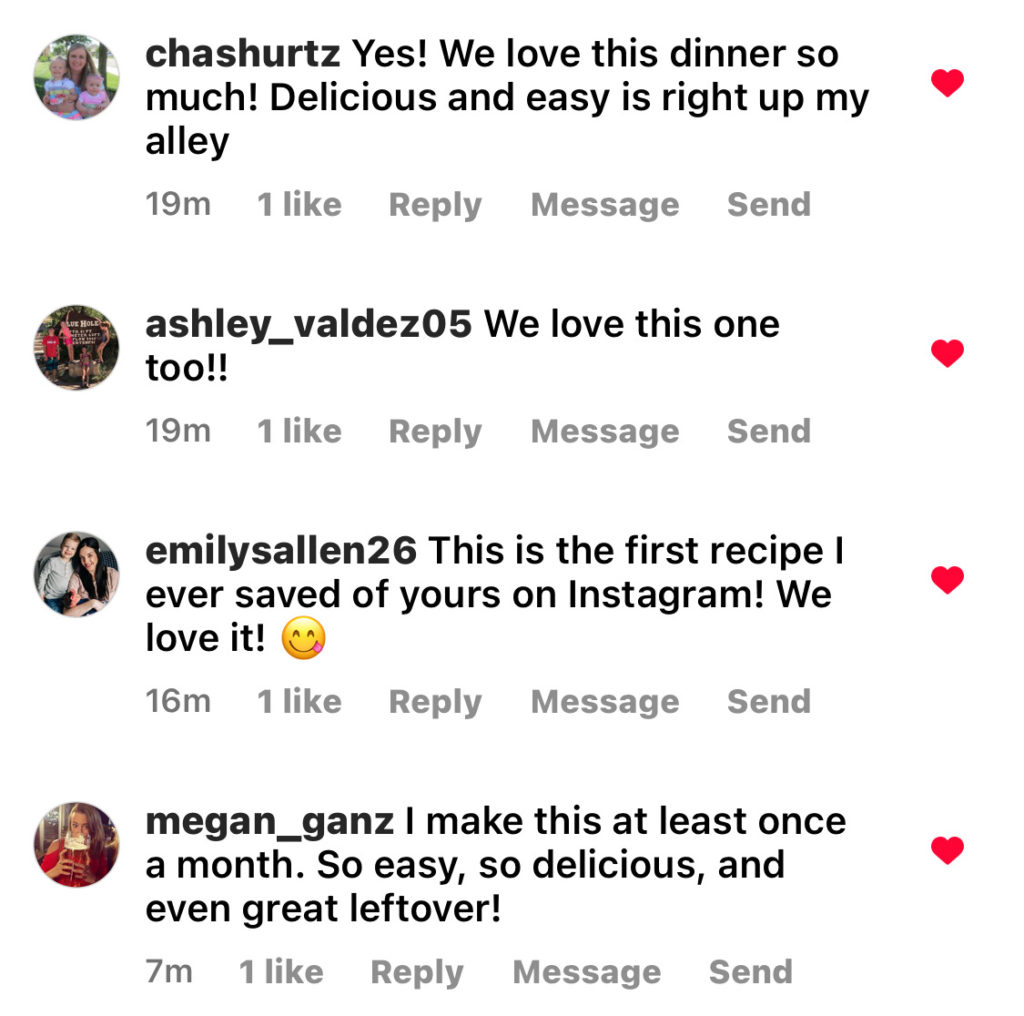
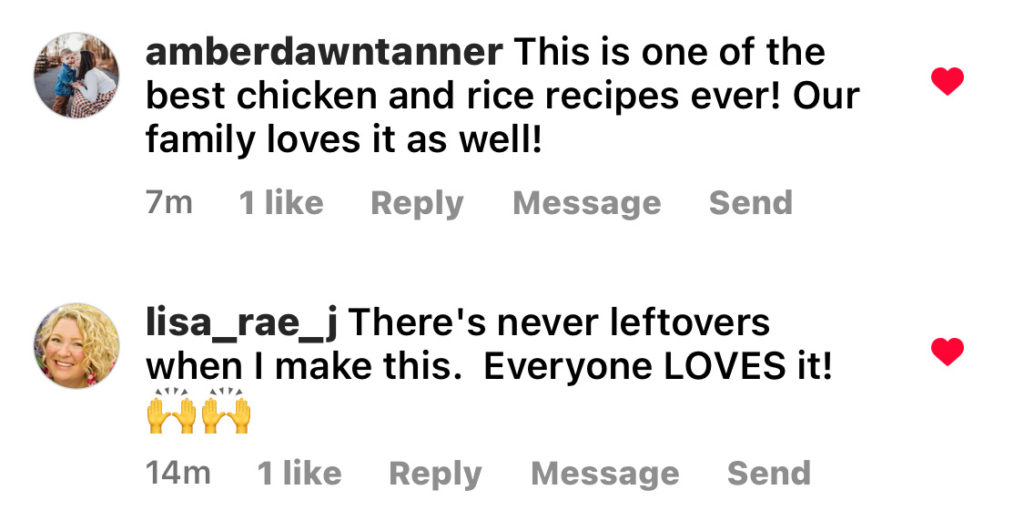
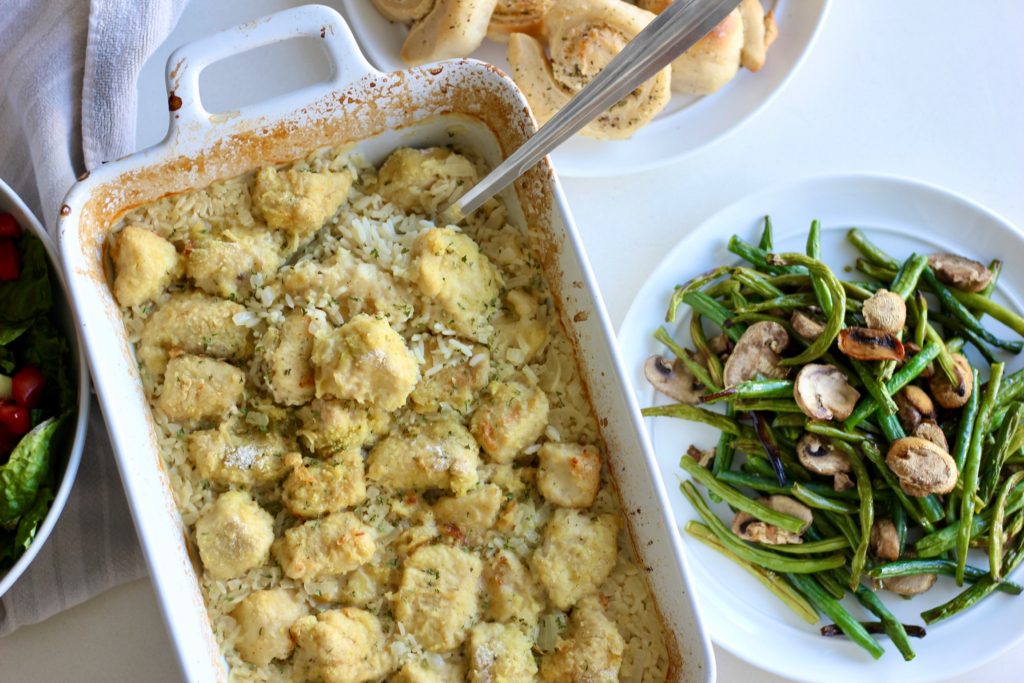
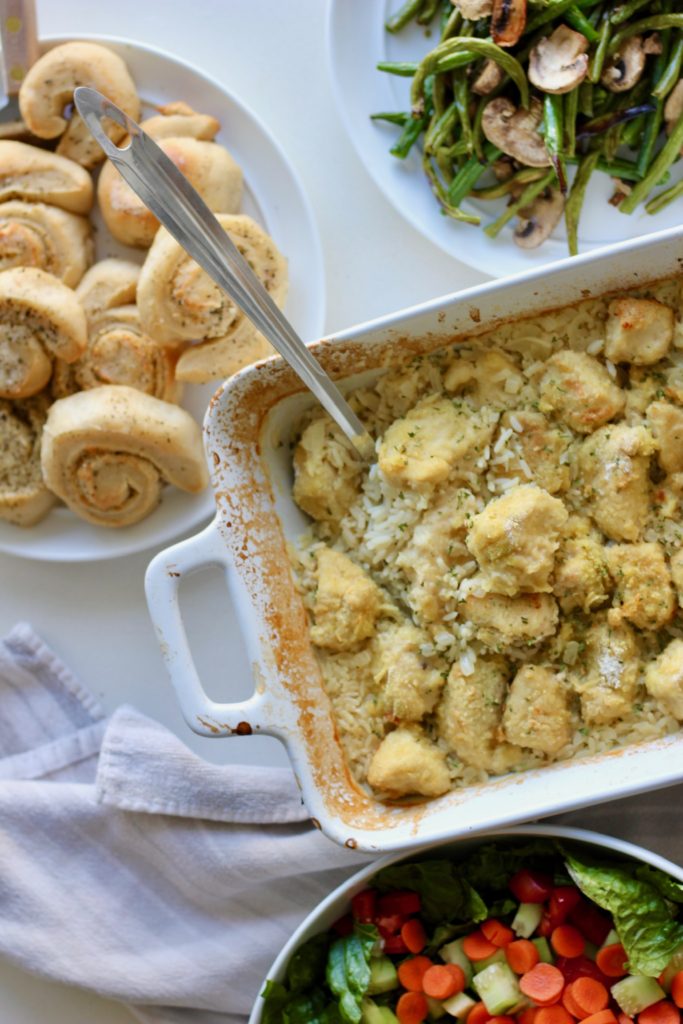
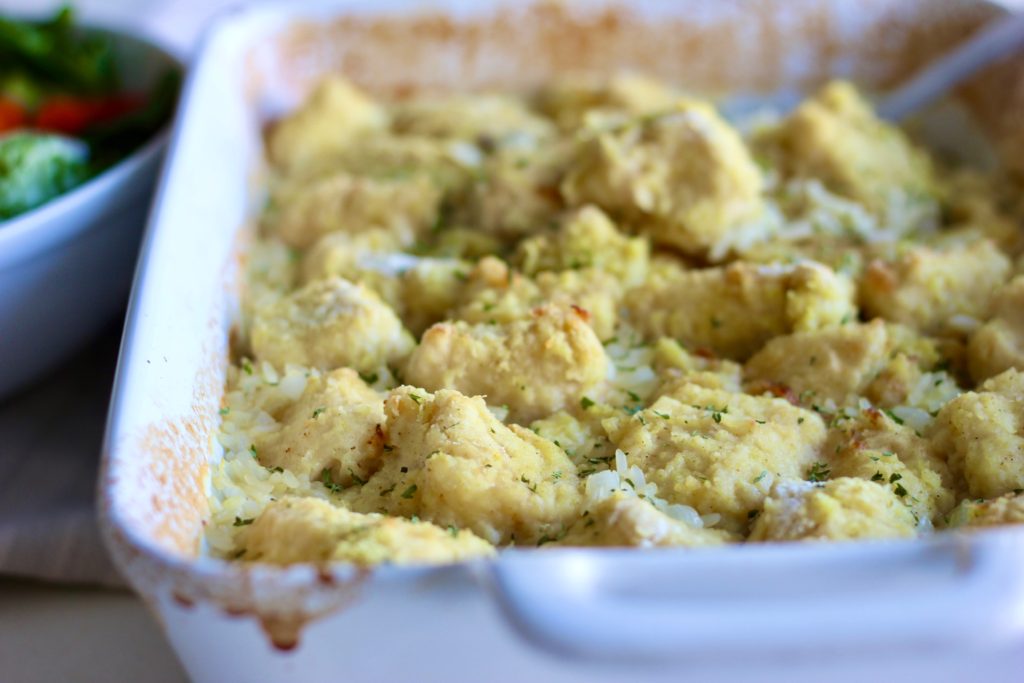
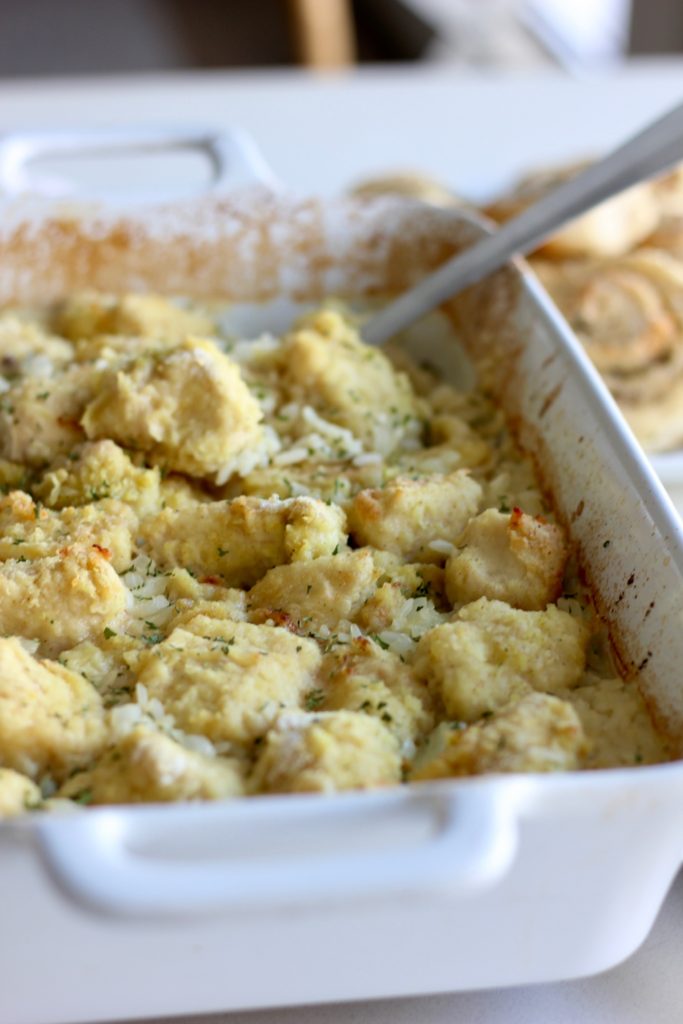
This has been a wildly popular recipe over the years for my Instagram crowd! Really, you can’t go wrong with this one! Juicy, tender chicken with a delicious breading on it, in a pile of flavorful, buttery rice. If you haven’t made it yet, trust me, YOU WILL LOVE IT!
This has been a wildly popular recipe over the years for my Instagram crowd! Really, you can’t go wrong with this one! Juicy, tender chicken with a delicious breading on it, in a pile of flavorful, buttery rice. If you haven’t made it yet, trust me, YOU WILL LOVE IT!
Trust me, this is a GOOD ONE! Tried and true. I originally got the recipe from a friend maybe 15 years ago, and have since tweaked it a bit more to our preference. I make it all the time and it’s legitimately one of my kids favorites!
Yes, it does have three bake times. Don’t let that scare you. It’s not complex. It just takes a tad more time in the oven. Once you try it, you’ll be adding it into your dinner rotation of tried and tested meals!
what others are saying…
could i add extra ingredients?
Absolutely!
I hear back from readers often telling me that they love to make this with a generous sprinkle of grated cheese over the top, and a sprinkle of some minced green onions. Some have even said they love adding golden raisins to this recipe. (I’m not a raisin-lover, but if you are, that might be right up your alley!)
For a crunch, you could also add toasted slivered almonds or pine nuts!
To enhance the flavor, you could add marinated artichoke hearts, sliced mushrooms, or herbs like fresh chopped rosemary, basil or thyme.
And to finish it all off, it looks quite pretty to add a garnish of fresh chopped flat leaf parsley.
Feel free to play around and add whatever sounds good to you!
What ingredients do I need?
For this recipe you will need:
chicken breasts or chicken tenders
all-purpose flour
seasoned salt
fine sea salt
pepper to taste
Chicken broth or bone broth
a small diced onion
parboiled rice
a 9×13 inch baking dish
aluminum foil
how Do i make this recipe?
You start by preheating your oven to 375 degrees Fahrenheit.
After you turn that on, get your butter and put it into a 9×13 inch pan and straight into the oven. The butter will melt in the pan as the oven preheats. (Be careful not to let it sit in the oven for too long after it has melted.)
The next step is to trim your chicken. The chicken can be left in whole breast pieces, or tender size pieces, or cut up into bite-size pieces. I find that we like it best when the chicken is cut up into smaller chunks. (8-10 pieces per breast)
After the chicken is trimmed, get a large zip lock bag and add the flour and seasonings to it. Mix that together. Then once that is done, throw the chicken pieces into the bag and shake around.
Remove the baking dish from the oven. The butter should be melted and slightly browned. If it has significantly burned or turned black, discard the burnt butter and get some fresh melted butter into the pan.
Empty the floured chicken into the baking dish on an even layer.
Bake for 30 minutes, uncovered.
Meanwhile, chop your onion, measure your rice, and measure your chicken broth.
When the first 30 minute bake is up, remove the baking dish from the oven.
Using tongs, remove chicken pieces from pan and transfer them to another plate. When all the chicken has been removed Cover the plate with aluminum foil.
Pour the chicken broth, rice, and onion into the baking dish. Stir around. Set the chicken pieces on top of the broth and rice. Cover with aluminum foil. Put the baking dish back into the oven for another 30 minutes.
When the timer goes off, remove baking dish from oven. Remove the aluminum foil from both the baking dish and from the plate of chicken. Get your tongs again and put all of that chicken back into the baking dish, straight on top of the watery rice mixture. Put it back into the oven, uncovered for 15 minutes.
Remove from oven.
Serve immediately.
why are there three seperate bake times?
It sounds a little intense to have three separate bake times, but this allows the meal to be:
1-Baked in one baking dish (Less dishes! Yay!)
and,
2- Improves the taste of the chicken and rice significantly by being cooked together in the same pan with that and the onion. Hello FLAVOR.
how long does this take to make?
The bake time of this meal is one hour and fifteen minutes, but the hands on time is only about 20 minutes. Total time is one hour and thirty minutes from start to finish.
is this recipe freezer friendly?
It could be put into the freezer, but honestly I don’t think that chicken tastes that great once it is cooked, frozen, thawed and rewarmed. The magic of this meal is how juicy the chicken is… and I worry that freezing it could change that.
Having said that, It would still turn out fantastic if you went ahead and cut up the chicken, tossed it in the flour, then pre measured the rice and diced the onion AND THEN froze it before it was baked. That could save you time and steps and I feel like that would work just fine. I would just add about 5-10 minutes to the first bake time to give that frozen chicken a chance to cook thoroughly.
could I use chicken tenders instead of breasts?
Yes! Use whatever you have access to! Even boneless skinless chicken thighs would be FANTASTIC in this recipe!
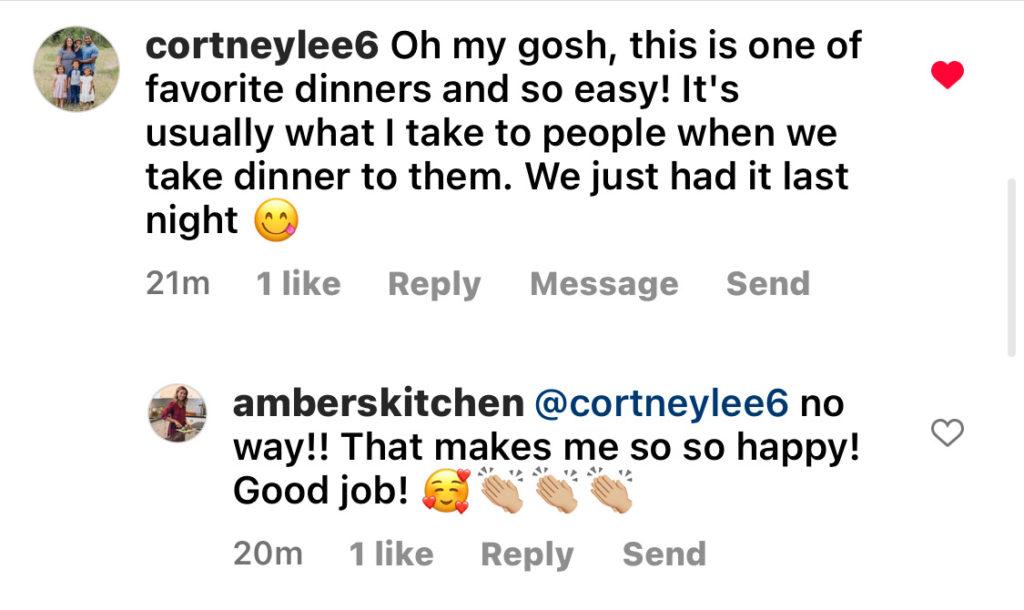
would this be a good meal to take to a friend/neighbor?
This is my go-to dinner-for-a-friend meal. It’s great because it’s all in one pan, there’s not many ingredients, and most everyone loves it! It’s basically like classy, and mouthwatering “chicken nuggets” in a delicious rice mixture. My tips when gifting this to a friend are:
#1: Take into consideration the size of the family you will be feeding. This recipe serves EIGHT. So, consider halving the recipe if you’ll be feeding a smaller crowd. #2: Prepare the recipe in a 9X13 disposable aluminum baking pan so that way, after your friend/neighbor is done with the meal, they don’t need to wash and return the pan!
How Do I store leftovers?
Store all leftovers in an airtight container and refrigerate quickly. To reheat, warm either in the microwave or over the stove for a few minutes or in a baking dish in the oven.
Can this recipe be halved?
YES! I understand that this recipe can be considered quite large since it serves EIGHT. Feel free to half the recipe and use an 8×8 baking dish instead of a 9×13 inch baking dish.
why parboiled rice?
Parboiled rice is rice that has been partially pre-boiled in the husk. Don’t let that confuse you, because it still requires nearly the same cooking instructions as other white rices. It’s just cooked up with a slightly different texture. Parboiled rice is one of my favorites because it has this unique ability to not get soggy or sticky, which is why I love to use it in many of my rice recipes!
Parboiled rice usually isn’t too difficult to find, as most grocery stores carry it. most of Uncle Ben’s rice is parboiled so that’s typically what I get.
Side note: If you haven’t yet, you MUST try my Cafe-Rio knock off recipe for cilantro lime rice also made with parboiled rice. It is soooooo good!
can I make this with brown rice or sticky rice?
BROWN RICE: I have never played around with adapting this recipe to be made with brown rice. I know it *can* be done, although I can’t give out specific baking times. Brown rice can take three to four times longer to cook than standard white rice, so I expect the baking time would need to be considerably increased.
STICKY RICE: Yes, It *can* be made with sticky rice, however it’s just better (in my humble opinion) when made with parboiled rice. If you do use sticky rice, the baking time would stay the same.
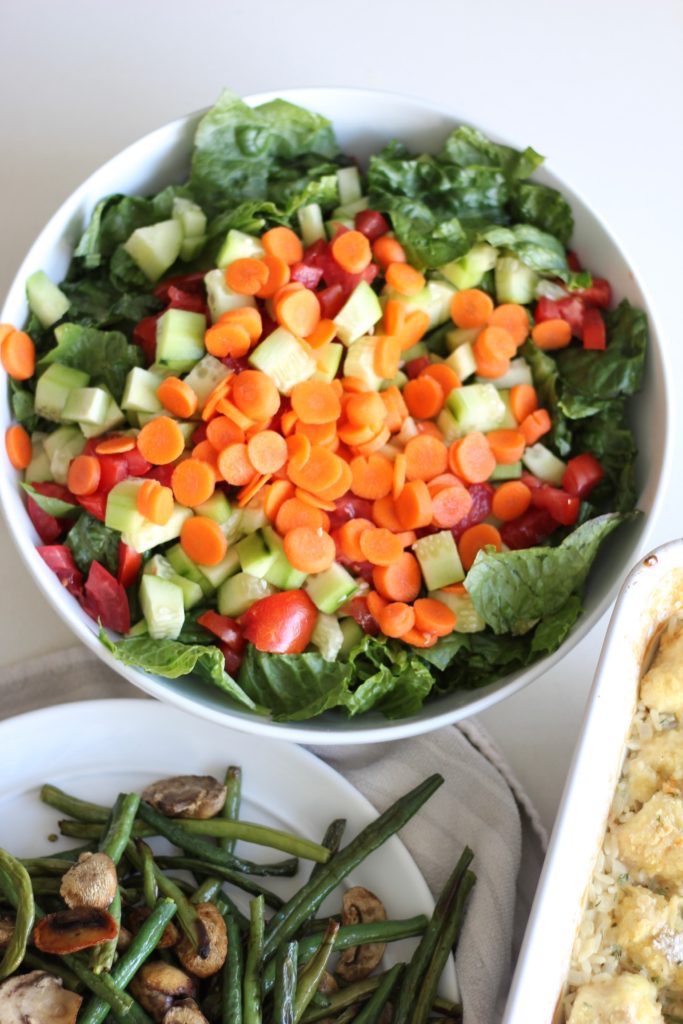
What Sides do you recommend with this recipe?
Whatever you want! I always like to do a green salad and a hot vegetable. If I’m feeling really fancy, I’ll add a roll or a fruit. Two common sides I serve are below:
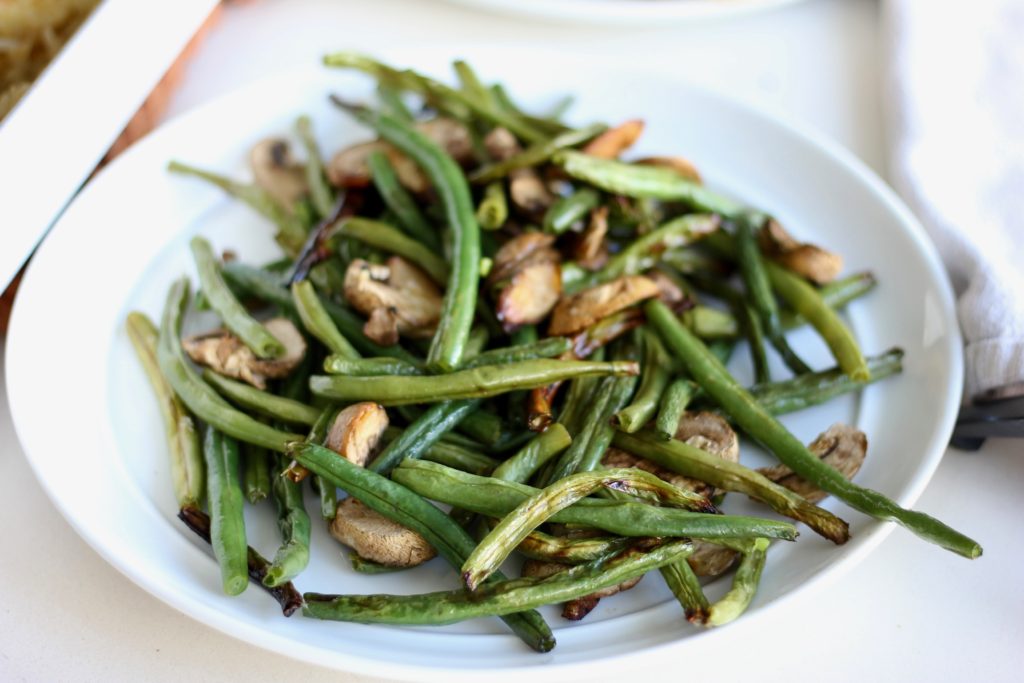
ROASTED GREEN BEANS WITH MUSHROOMS
Take some Fresh green beans, with edges trimmed and some sliced mushrooms. Layer them on a baking sheet lined with parchment paper, then drizzle on some avocado oil, a sprinkle of salt and roasted them at 400 degrees for 15 to 20 minutes. So Good!
SALAD
You can’t go wrong with a basic green salad. We have a green salad with almost every sit-down family dinner. I just combine Romaine lettuce -or any green I have on hand- that has been washed and chopped, and whatever veggies are in the fridge.I recently upgraded my salad spinner to a bigger model and it makes washing and drying lettuce SO. MUCH. EASIER.And when it’s easier, then I’m way more likely to make salads!
DRESSING
For a dressing we either just toss it with some olive oil, vinegar (either champagne vinegar, or thewhite peach balsamic vinegar from BAKER AND OLIVE that we’ve been obsessed with lately), and a sprinkle of salt and pepper. If I wanted to spend a few minutes making a yummy dressing, I would combine 1/2 cup of oil ( either avocado oil or olive oil) 3 Tablespoons of vinegar, 1 Tablespoon of pure maple syrup (optional) a squirt of mustard, (like a teaspoon) a dash of onion powder, garlic powder, and maybe some parsley or basil. Then I would blend it together and toss it over the salad
NOTE: You can get 10% off your BAKER and OLIVE order with my affiliate coupon code, “AMBERSKITCHEN”
Trust me, this is a GOOD ONE! Tried and true. I originally got the recipe from a friend maybe 15 years ago, and have since tweaked it a bit more to our preference. I make it all the time and it's legitimately one of my kids favorites!
1.5 Poundschicken breasts or chicken tendersabout 3 chicken breasts worth
1/2Cupflour
1 Teaspoonseasoned salt
1/2Teaspoon fine sea salt
1/4Teaspoonpepperor to taste
4CupsChicken broth or bone broth
1small diced onion
1.5 Cupsparboiled rice
9x13 inch baking pan
aluminum foil
Prevent your screen from going dark
Instructions
You start by preheating your oven to 375 degrees Fahrenheit.
After you turn that on, get your butter and put it into a 9x13 inch pan and straight into the oven. The butter will melt in the pan as the oven preheats. (Be careful not to let it sit in the oven for too long after it has melted, otherwise it will burn.)
The next step is to trim your chicken. The chicken can be left in whole breast pieces, or tender size pieces, or cut up into bite-size pieces. I find that we like it best when the chicken is cut up into smaller chunks. (8-10 pieces per breast)
After the chicken is trimmed, get a large zip lock bag and add the flour and seasonings to it. Mix that together. Then once that is done, throw the chicken pieces into the bag and shake around.
Remove the baking dish from the oven. The butter should be melted and slightly browned.
Empty the floured chicken into the baking dish on an even layer.
Bake for 30 minutes, uncovered.
Meanwhile, chop your onion, measure your rice, and measure your chicken broth.
When the first 30 minute bake is up, remove the baking dish from the oven.
Using tongs, remove chicken pieces from pan and transfer them to another plate.
Pour the chicken broth, rice, and onion into the baking dish. Stir around. Set the chicken pieces on top of the broth and rice. Cover with aluminum foil. Put the baking dish back into the oven for another 30 minutes.
When the timer goes off, remove the aluminum foil from the baking pan. Put it back into the oven, uncovered for 15 minutes.
Hi Claire! Yes that’s okay, it doesn’t change the cooking time. Next time you get a chance though, make it with parboiled rice, it’s just a little bit better.:)
Renee, so glad your family likes it too. It’s nice to have some family favorites in your back pocket. Thanks so much for taking time to give your feedback:)
I love that you could share these recipes, and you are such a good friend to bring meals over! Thanks for the feedback, hope you continue to enjoy the recipes!
Great question! I’ve never done this as a freezer meal and I don’t know, honestly, how well it would work because of the steps involved. And because I haven’t tested it I can not say for sure. Sorry I’m not much help on that!
Just so you’re aware, your first set of instructions says to leave the chicken out when you cook the rice for 30 minutes (with aluminum foil on top) but the shortened version of the recipe says to add the chicken to the top of the rice and broth.
I'm obsessed with all things food and a mom to five. Baking bread and using my instant pot are my favorite things to do in the kitchen, and I can't wait to bring all that I have learned to you! Connect with me on Instagram because there's where I basically live these days.

 Trust me, this is a GOOD ONE! Tried and true. I originally got the recipe from a friend maybe 15 years ago, and have since tweaked it a bit more to our preference. I make it all the time and it’s legitimately one of my kids favorites!
Yes, it does have three bake times. Don’t let that scare you. It’s not complex. It just takes a tad more time in the oven. Once you try it, you’ll be adding it into your dinner rotation of tried and tested meals!
Trust me, this is a GOOD ONE! Tried and true. I originally got the recipe from a friend maybe 15 years ago, and have since tweaked it a bit more to our preference. I make it all the time and it’s legitimately one of my kids favorites!
Yes, it does have three bake times. Don’t let that scare you. It’s not complex. It just takes a tad more time in the oven. Once you try it, you’ll be adding it into your dinner rotation of tried and tested meals!


 ROASTED GREEN BEANS WITH MUSHROOMS
Take some Fresh green beans, with edges trimmed and some sliced mushrooms. Layer them on a baking sheet lined with parchment paper, then drizzle on some avocado oil, a sprinkle of salt and roasted them at 400 degrees for 15 to 20 minutes. So Good!
ROASTED GREEN BEANS WITH MUSHROOMS
Take some Fresh green beans, with edges trimmed and some sliced mushrooms. Layer them on a baking sheet lined with parchment paper, then drizzle on some avocado oil, a sprinkle of salt and roasted them at 400 degrees for 15 to 20 minutes. So Good!
 SALAD
You can’t go wrong with a basic green salad. We have a green salad with almost every sit-down family dinner. I just combine Romaine lettuce -or any green I have on hand- that has been washed and chopped, and whatever veggies are in the fridge. I recently upgraded my salad spinner to a bigger model and it makes washing and drying lettuce SO. MUCH. EASIER. And when it’s easier, then I’m way more likely to make salads!
DRESSING
For a dressing we either just toss it with some olive oil, vinegar (either champagne vinegar, or the white peach balsamic vinegar from BAKER AND OLIVE that we’ve been obsessed with lately), and a sprinkle of salt and pepper. If I wanted to spend a few minutes making a yummy dressing, I would combine 1/2 cup of oil ( either avocado oil or olive oil) 3 Tablespoons of vinegar, 1 Tablespoon of pure maple syrup (optional) a squirt of mustard, (like a teaspoon) a dash of onion powder, garlic powder, and maybe some parsley or basil. Then I would blend it together and toss it over the salad
NOTE: You can get 10% off your BAKER and OLIVE order with my affiliate coupon code, “AMBERSKITCHEN”
SALAD
You can’t go wrong with a basic green salad. We have a green salad with almost every sit-down family dinner. I just combine Romaine lettuce -or any green I have on hand- that has been washed and chopped, and whatever veggies are in the fridge. I recently upgraded my salad spinner to a bigger model and it makes washing and drying lettuce SO. MUCH. EASIER. And when it’s easier, then I’m way more likely to make salads!
DRESSING
For a dressing we either just toss it with some olive oil, vinegar (either champagne vinegar, or the white peach balsamic vinegar from BAKER AND OLIVE that we’ve been obsessed with lately), and a sprinkle of salt and pepper. If I wanted to spend a few minutes making a yummy dressing, I would combine 1/2 cup of oil ( either avocado oil or olive oil) 3 Tablespoons of vinegar, 1 Tablespoon of pure maple syrup (optional) a squirt of mustard, (like a teaspoon) a dash of onion powder, garlic powder, and maybe some parsley or basil. Then I would blend it together and toss it over the salad
NOTE: You can get 10% off your BAKER and OLIVE order with my affiliate coupon code, “AMBERSKITCHEN”

Hands down, one of my all-time favorite dishes. It’s simple and I haven’t met anyone who doesn’t love it.
Author
Denise,
Love that! Thank you so much for taking time to comment:)
Would it be okay to substitute parboiled rice for regular white rice? Would the subbing alter the cooking time?
Don’t sub it for regular! The parboiled really does matter. 🙂
Author
Hi Claire! Yes that’s okay, it doesn’t change the cooking time. Next time you get a chance though, make it with parboiled rice, it’s just a little bit better.:)
This has fast become a family favorite. So good, simple, wholesome and delicious.
Author
Renee, so glad your family likes it too. It’s nice to have some family favorites in your back pocket. Thanks so much for taking time to give your feedback:)
This is my go to make for a friend meal, like you said!
Thanks so much for all the great recipes!
Just sent this over to a friend that just had a baby, along with your French toast bake and cinnamon rolls!
Author
I love that you could share these recipes, and you are such a good friend to bring meals over! Thanks for the feedback, hope you continue to enjoy the recipes!
Will you be my neighbor?! 💕💕💕
Author
Haha! <3
can this be a freezer meal somehow?
Author
Great question! I’ve never done this as a freezer meal and I don’t know, honestly, how well it would work because of the steps involved. And because I haven’t tested it I can not say for sure. Sorry I’m not much help on that!
Just so you’re aware, your first set of instructions says to leave the chicken out when you cook the rice for 30 minutes (with aluminum foil on top) but the shortened version of the recipe says to add the chicken to the top of the rice and broth.
Emma, thank you so much for pointing that out! I have fixed the instructions. I hope you loved the recipe!
We made this today and loved it! It’s going in our rotation of meals. So happy to have found this! Thank you Amber!
Thank you Breanna! I’m so glad that you loved this recipe!
Love this recipe! It’s a favorite of ours and the kids always chow down! It’s a staple in our household for sure!
Thank you so much for the review, Lindsey!
My family loves this recipe. Quick, easy and the kids enjoy it.
Thanks so much for the kind comment, Alex!
How many people does this serve?
This recipe serves 8. I have updated the recipe card to include that info. I hope you love it!
Have you ever tried to bake two pans of this side by side in the oven? Just curious if baking time increases?
Hi Hillary, I actually have not tried, but I assume it would be fine. When in doubt use a food thermometer to make sure chicken gets to 165ºF.