Published Date: July 31, 2022 | Last Updated: June 26, 2024
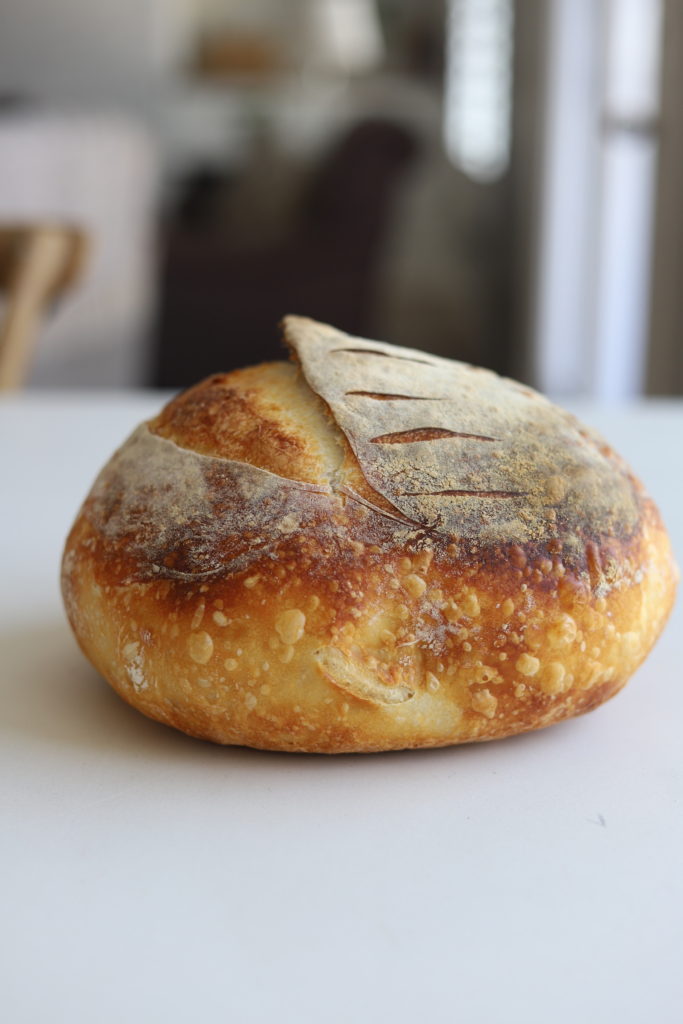
This iconic Sourdough crusty artisan loaf is a thing of beauty. Crusty on the outside, delicate soft crumb on the inside. Only 4 humble ingredients combine to make this classic masterpiece.

This iconic Sourdough crusty artisan loaf is a thing of beauty. Crusty on the outside, delicate soft crumb on the inside. Only 4 humble ingredients combine to make this classic masterpiece.

YOU CAN MAKE THIS BREAD!
Of all the sourdough recipes I have, this is definitely the most technical. It’s not exactly in the “fast and easy” category. The entire process can take up to 36 hours. It uses more tools than any other recipe. But the result is truly a work of art. Making something magical out of 4 simple ingredients takes some effort. Having said that, even if you are a sourdough beginner, YOU CAN MAKE THIS! My directions are well laid out and specific. If you follow them, you will have success making the most glorious loaf of bread you’ve ever laid eyes on! The first time you make it, it may feel intense. But come back again and again, and pretty soon you’ll be making it with your eyes closed and all of your friends and neighbors will want to be your best friends so that they can get sourdough bread benefits!LET’S CHAT SOURDOUGH…

Some Sourdough Lingo
NATURAL YEAST = SOURDOUGH = WILD YEAST These are all interchangeable synonyms. ACTIVE STARTER: A synonym for this is LEVAIN. Active starter is starter that has been activated by a recent meal of flour and water. It is full of bubbles and has about doubled in volume after its feed. Active starter is what is needed to give lift to any leavened bread. If it is not active and strong, it will not rise your bread. The bigger the feed, the longer it will take to become active. The smaller the feed, the sooner it will become active. DISCARD: runny starter that is in its inactive state. This can be fed to activate, or you can add the runny discard to most baked goods. HOOCH: The liquid, sometimes dark colored that accumulates on top of your flat and runny discard starter is called “hooch”. Active starter will never have a hooch. The hooch will only be present once the starter has eaten all of it’s available food and now it is hungry again. The hooch is technically the waste product of the starter. Depending on your preferences, the hooch can be poured off before a feed to maintain a fresh tasting starter. If you prefer your sourdough bakes to taste more sour, stir the hooch in with the feed. Anytime that there is hooch on your starter, clear or dark colored, it means that your starter is HUNGRY. FEED: Your starter requires only two things. 1- flour and 2- water. A feed is simply giving your starter about equal weights of flour and water, mixed together into your starter until it resembles a thick pancake batter consistency. POWERFEED: A powerfeed is just a feed ratio that encourages your starter to increase it’s strength and metabolism. This can be used for when your starter has been unfed for a longer period of time, or when your starter seems to be underperforming. Generally the ratio is a very small amount of starter and a large amount of food. A 1:4:4 ratio or a 1:8:8 ratio could be considered a powerfeed (1 part starter: 8 parts water: 8 parts flour). Usually a powerfeed works best when it is done every 12-24 hours for 2-4 days. It really gives a starter a jump start and rev’s up it’s metabolism and strength. For those struggling to get their sourdough to rise, I encourage a series of powerfeeds to help their starter gain strength. When doing powerfeeds, you may end up with some extra discard starter laying around. You can either toss it, or use it to make a discard recipe. Add the “discard” to pancake batter, German pancakes, or another recipe that uses discard.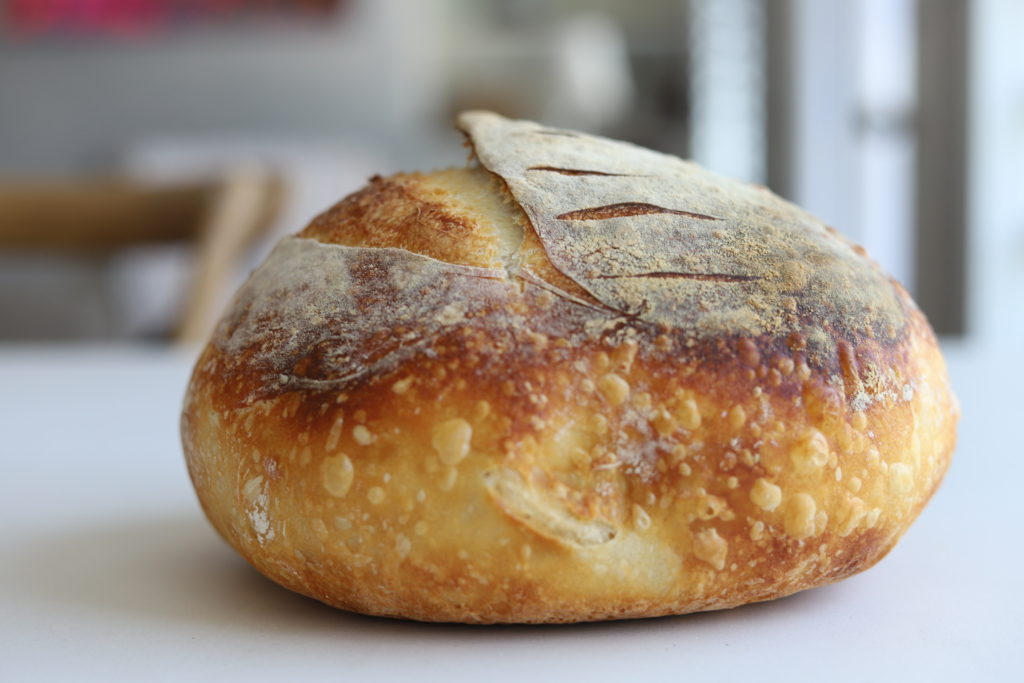
Special notes
- You can double this recipe if you want! (I usually do!) Double the ingredients and do all the steps up until after the bulk ferment. Then just divide the dough in two when it is time to form. and let the rise do it’s cold proof in two separate banneton baskets. You do not need two Dutch ovens. Just bake the first loaf, then when it’s done, put the second loaf into the Dutch oven.
- If your loaves aren’t rising or are turning out dense, we need to strengthen your starter with more consistent feeds. A weak starter will not have enough strength to rise bread. See the note above about powerfeeds.
- You can absolutely use this base recipe and add whatever else you want to the dough, such as nuts, seeds, cheddar, herbs, garlic, jalapeno, or cheese (cheddar and jalapeno is an amazing combo FYI). If adding any of these, do so during the lamination step right before it is folded up.
WHAT supplies and tools ARE helpful FOR THIS RECIPE?
- A SIX QUART DUTCH OVEN. It’s very difficult to make this bread without a Dutch oven. However, if you don’t have a pretty enameled cast iron Dutch oven, let’s think outside of the box. You CAN use a non-enameled Dutch oven. (Do you have one in your camping supplies?) This also works with an oven-proof stainless steel pot with a lid. If none of those are an option, consider borrowing one from a friend, or checking thrift stores and Facebook marketplace for a used one. Or consider pulling the trigger for a new Dutch oven. This is the one I have and love. It is affordable and has been a good investment over the years.
- A KITCHEN SCALE. Since the ingredients are only given by weight, it would be best to have a kitchen scale. It doesn’t have to be an expensive one.
- A BANNETON BASKET. A banneton basket is not completely necessary, but it is a helpful tool to have. It helps shape the dough into the ideal preferred shape. It is an adaptable shaping basket that can go from room temp, to fridge, wet to dry with no aggravation. I do recommend having one, but it’s possible to do sourdough without one. Here is an affordable sourdough bundle with multiple tools. I recommend a 8.5 or 9 inch banneton for this recipe.
- PRE-CUT PARCHMENT PAPER. You need parchment paper for this method! Pre-cut parchment is convenient if you have access to it.
- SOURDOUGH “SHOWER CAPS”. These are VERY helpful and convenient when working with this type of sourdough that has to be kept air tight at all times. I found this bundle of 100 food grade “shower caps” and I love them! I use them every time I make this recipe.
- CRUSTY BREAD STORAGE BAGS After your bread is made and cooled, please DO NOT STORE IT IN A PLASTIC BAG! Crusty bread stored in plastic becomes quite chewy, in an unpleasant way. I find that storing it in paper, or even just wrapped in a clean kitchen towel is best at preserving it’s freshness and crispness. I love these bags for gifting or traveling.
- A LAME BLADE. “Lame” (pronounced LAHM) means “blade” in French. A Lame blade is helpful to use to score the dough, however, if you are just starting out, it isn’t 100% necessary. You can use any kind of ultra-sharp blade. A very sharp knife, a very sharp razor blade or sanitized box cutter. If you are a serious baker, take note that a lame blade can go dull fairly fast. My advice is to use one corner of the lame for each time or two you score bread. So one blade will last you only 4 to 8 loaves. Luckily replacement blades are inexpensive. Just be sure to change them out frequently.
- A LARGE BOWL WITH A LID. You probably already have some type of bowl in your kitchen that will work for this. I find that a semi-large bowl with a lid is really helpful for making the dough in and performing the stretch and folds.
- A DOUGH SCRAPER. This isn’t a deal breaker but it’s helpful to have when it comes to cleaning your work surface, scraping dough off your hands, to use for stretch and folds, or to divide dough. You could absolutely just use a knife instead.
- A SHARP BREAD KNIFE A super sharp knife makes all the difference when it comes to cutting through those very crusty loaves of bread. If you don’t already have a bread knife that you absolutely love, may I recommend the ultra-affordable Mercer Culinary bread knife. If your budget has more flexibility and you’re a serious bread baker, a more professional Wustof bread knife that lasts a lifetime and comes highly recommended for really crusty bread. I finally pulled the trigger on the Wustof knife and have been absolutely loving it!
What is a stretch and fold?
This method uses “stretch and folds” instead of a traditional kneading. Stretch and folds are best for this dough since it is more wet than many other doughs. This method helps develop gluten structure and elasticity. It also stimulates fermentation because with each stretch and fold, you are renewing the food source for the natural yeast. You will notice the texture changes and it is more flexible and relaxed with each series of folds. How to perform the STRETCH and FOLD: After combining all of your ingredients and letting them rest for 30 minutes, come to the dough and grab onto dough on the side of the bowl. Pull that dough up and over to the opposite side, where you will gently push it in. Then turn the bowl 90 degrees and repeat with the next “corner”. Do this to all four “corners” of the dough. Then turn the dough ball upside down and cover the dough in the bowl. Come back to the dough and repeat the process every 20 to 30 minutes for a total of 4 times over two hours. (If you skip one time, it’s not the end of the world.)what is lamination?
“Laminating” the dough for sourdough is a step that helps the dough build strength and is typically done before shaping. This step agitates the strands of gluten and strengthens them, resulting in a fantastic open crumb end product. Lamination for sourdough is not quite the same as it would be for a buttery crescent dough, but almost! To laminate the dough, dump the dough onto the counter and start gently flattening and pulling on the edges of the dough to make the dough thinner and thinner in the shape of a square. Don’t pull hard, just pull little by little. Keep going until the dough is very thin, being careful not to tear it. This is not a fast process, it can take a while for the dough to stretch out fully. Remember, little by little! Be patient as you use your fingertips to keep gently stretching the edges of the dough. Aim for it to take on the shape of a square. If any holes are accidentally made, just push the dough back together in that spot to repair the hole. If you are wanting to add in any extras to your dough (nuts, seeds, cheddar, jalapeños, herbs, etc) these are perfect to add right after lamination while the dough is flat and before it is folded up and shaped.Other Ways to Use Sourdough
Once you get a hang of sourdough, it will become your best friend! Here are some of my favorite sourdough recipes. Directions on homemade sourdough bagels can be found here.


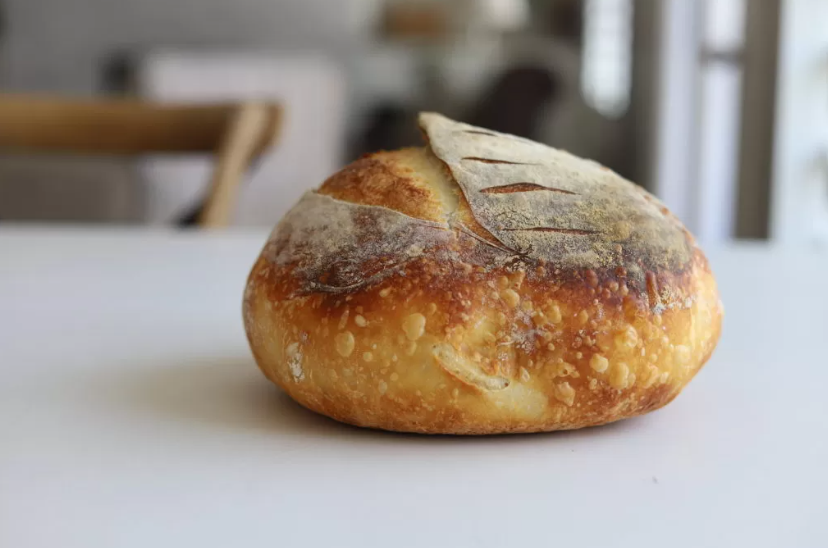
Crusty Dutch Oven Sourdough Bread
This iconic Sourdough crusty artisan loaf is a thing of beauty. Crusty on the outside, delicate soft crumb on the inside. Only 4 humble ingredients combine to make this classic masterpiece.
Print
Pin
Rate
Servings: 1 loaf
Ingredients
- 125 grams active starter
- 390 grams water
- 500 grams high quality bread flour
- 12 grams fine sea salt
Instructions
- Activate your starter. Activate it using whatever ratio works best for your schedule. You will just need a total of 125 grams of starter, which is about one volume cup. If you need help figuring out how to activate your starter you can use this ratio: in a jar combine 1/4 cup runny discard starter with a heaping 3/4 cup flour and a tad under 3/4 cup water. Mix together until the mixture resembles a thick, pancake batter texture. (if it is too thin, add more flour. if it is too thick add more water.) This will yield enough for the recipe, plus a little extra for the reserve starter. Mark the height of starter right after the feed with a rubber band or with a dry-erase marker. Wait approximately 4 to 7 hours for mixture to activate, double in size and fill with bubbles in volume. When it has reached that point, work fast! It's time to move!
- Combine water and active starter. In a large bowl, combine 390 grams of water and 125 grams of the active starter. Mix together until it becomes a milky-looking mixture.
- Add the remaining ingredients and let it rest . Add 500 grams of flour and 12 grams of salt. Use a danish dough whisk (or your hands) to mix it all together in the bowl. The result will be a very shaggy, unsmooth, sticky mess. Clean off your fingers. Cover the dough and let it rest for 30 minutes.
- Do the Stretch and folds. Come back to the dough and do your first "stretch and fold" (see note above). Repeat the stretch and folds every 20 to 30 minutes for a total of 4 times over two hours. You will notice the dough changes considerably in structure and strength with each stretch and fold. Make sure that the dough is covered with a lid in between the stretch and folds.
- Bulk Ferment. Cover and let bulk ferment at room temperature until the volume of the dough has increased by 50%. This may take 3-6 hours depending on the ambient temperature in your house, and the strength of your sourdough starter.
- Laminate. On a clean surface, dump dough onto countertop. Very gently "laminate" the dough. (see note above) To laminate the dough, you gently stretch the dough into a thin, rectangular layer on your countertop. Work carefully to prevent tears in the dough. Try and avoid using flour on your workspace if possible, or use only very minimal flour.
- Preshape. With the laminated dough, fold 1/3 of the dough inward, then fold the opposite 1/3 side of the dough inward as well. With the triple layer in the center, start at one end and tightly roll it up into a wonky shaped ball.
- Rest. Cover the wonky shaped dough ball with either a bowl or a towel and let it rest at room temperature for 30 minutes.
- Shape. Using a minimal dusting of flour, or no flour if possible, use your hands to smooth the wonky shaped ball into a tight, yet smooth ball. Gently pull and turn the dough ball back and forth over the countertop to create tension, being careful that the dough does not overstretch or tear the smooth layer of dough on top of the round.
- Transfer to Banneton. When it is formed into a tight ball, generously dust the top of the dough with flour and spread it onto the top surface of dough using your hand. If you have brown rice flour, (not necessary but helpful since it is less sticky) you can use brown rice flour instead of bread flour. Sprinkle some of the (brown rice or bread) flour on the inside of the banneton basket liner to prevent sticking. Turn the dough ball upside down and place it bottom up into the lined and floured banneton basket. Cover your banneton basket with a dough shower cap so it won't dry out.
- Cold Proof. Transfer covered dough to the refrigerator and let it cold proof. A cold proof is helpful for both fermentation, and for ideal oven spring. Eight to Twelve hours is the ideal amount of time, however, I do often let it cold proof for 24 hours when convenience beats out my need for a perfectly fermented loaf.
- Preheat. Put your Dutch oven inside of your oven with a pizza stone or a cookie sheet underneath it to prevent too crusty of a bottom. (trust me on this don't skip the cookie sheet/pizza stone under the Dutch oven!) Preheat the oven to 450 degrees Fahrenheit. Once it reaches temperature, let it stay at that temperature for at least 30 minutes before putting in the dough.
- Transfer to Parchment Paper and Score. Remove the cold dough from the refrigerator. Using a sheet of parchment paper, empty dough out of banneton so it is right-side-up (floured side up) on the parchment paper. Using a sharp Lame blade, confidently score the top of the dough in a crescent shape, or in whatever shape or design that you like. Scoring not only adds decoration to the top of the loaf, but more importantly it gives the steam somewhere to go, which means it will help the dough lift UP instead of OUT, making a beautiful oven spring.
- Transfer to Dutch oven and Bake. Carefully remove the hot Dutch oven from the oven, open the lid and using the corners of the parchment paper, lift the dough into Dutch oven and put the lid back on. Put it back into the oven and Bake at 450° F for 30 minutes. Then remove the lid and bake another 10-15 minutes or until the golden crust has achieved the right color. Remove immediately.
- Let Cool. Set the hot loaf onto a cooling rack and let it cool for at least one hour before slicing into it. (Waiting is the hardest part of the whole process!) If you cut into it early, the still hot tender crumb will tear and turn to mush. I know it's tempting, but trust me. Just wait!
- ENJOY! Slice into the bread and enjoy with softened grass fed butter, with olive oil and vinegar, or in whatever way you would like. Close your eyes and savor every bite! ENJOY!!!
Notes
Special notes
- You can double this recipe if you want! (I usually do!) Double the ingredients and do all the steps up until after the bulk ferment. Then just divide the dough in two when it is time to form. and let the rise do it's cold proof in two separate banneton baskets. You do not need two Dutch ovens. Just bake the first loaf, then when it’s done, put the second loaf into the Dutch oven.
- If your loaves aren't rising or are turning out dense, we need to strengthen your starter with more consistent feeds. A weak starter will not have enough strength to rise bread. See the note above about powerfeeds.
- You can absolutely use this base recipe and add whatever else you want to the dough, such as nuts, seeds, cheddar, herbs, garlic, jalapeno, or cheese (cheddar and jalapeno is an amazing combo FYI). If adding any of these, do so during the lamination step right before it is folded up.

Love your bread recipes. What do you do if you have added all the flour the recipe says too but the dough is still super sticky? Do you keep adding more flour?
Author
Hi Brenda, Good question! This is a pretty wet dough so it will be more on the wet side. Having said that, the exact weight I provide will yield a different result in a different area or the world depending on the atmospheric pressure and humidity. It should be a sticky but not too wet of a dough. If it is feeling too wet from the second or so stretch and fold, you can add a few sprinkles of flour, being careful to incorporate them fully during the stretch and folds. Hope that helps!
Im so disappointed… have followed religiously all quantities but my dough has just got wetter and wetter through the stretch and fold section. By the time i turned it out it just collapsed into a soggy pancake all over the counter. Ive added a little more flour and put it in the fridge till the morning but Im not hopeful 😏. Im not a sour dough newby either so not sure whats gone wrong 😑
Depending on your starter and the climate you could need more or less flour that I use! Let me know how it turned out.
I have persevered for literally weeks trying to be sure my starter was active. Newby here.
I’m really struggling with the dough at the lamination phase, being so sticky. I tried not to add too much more flour, but it is sticking to the counter. I’m in Mississippi and it’s been very humid. Might that be the problem?
Hi Rhoda, the climate and the consistency of your starter really affects how much flour you need. You can definitely add more flour until it’s not so sticky. Also, extra stretch and folds can help too. You can add more flour before you do stretch and folds and then add more flour again after if it still seems too wet. Hope this works out for you!
I live in a dry climate in a high altitude and this dough is always too sticky. I have lowered the amount of water I use to 350 grams and now it works perfectly every time. People rave about this bread when I make it but I definitely have to use less water.
Natalie, I’m so glad that you have found a method that works for you. Thank you so much for sharing!
What’s the iternal temperature of bread when it’s done?
This recipe has been one of the best I’ve tried! Only thing I’m struggling with is getting the crust thick. It’s still a little soft after baking. Any tips?
Author
I’m so glad that you like it! One way to get the crust thicker and crustier is to first bake in the dutch oven for 30 minutes, then remove the dutch oven completely and put the naked loaf right on the wire rack for another 15 minutes. This will brown and thicken the crust quite a bit!
If storing in the freezer do you just keep them in the brown bags as well. Do they need to be air tight? And how to defrost?
An airtight bag is best!
I made this bread, and while beautiful, it was really bland tasting. Any ideas why?
Hi Kristin, did you add the salt? Without salt it will taste very bland.
Have tried this several times. And I’ve watched people (including you) make this but have never heard about a cold proof! Oh man. I’m so confused. I guess I’ll have to try it next time. This time I didn’t read that before leaving it to prove. At least I got closer this time! It’s usually too wet but I think I need to add a little more flour.
Can this bread be frozen? Obviously it is best fresh. But I’m trying to figure out a way to make more and freeze with out it totally drying out! Any suggestions? Thanks!
Hi Amy, you can freeze it after it is baked. When you want to eat it, take it out of the freezer, run it under hot water for a second and bake in the oven for a few minutes or until it is warmed up.
Hey! 🙂 do you ever let your dough bench rest on your counter after placing in the banneton? Do you stitch it up before placing in the fridge? Thank you!
Hi Kassidy, no, I put it right in the fridge.
Love your recipe. One question, do you bake the bread the whole time with the Dutch oven on a cookie sheet?
Hi Maddie, yes you can keep the Dutch Oven on a cookie sheet for the whole time.
Great bread recipe but I am having a little trouble with my dough keeping its round shape. Am I not stretching/laminating enough?
Hi John, stretch and folds, and slap and folds help. If dough feels excessively wet, you can add a dusting of flour on the counter when you shape to help feel more firm.
I absolutely love this recipe and use it almost weekly! It’s easy to follow and I’ve gotten beautiful loaves since day one!
I’m wondering if you have the nutrition facts anywhere for this recipe? Thanks in advance!
I’m so glad that you love this recipe! I do not have nutritional facts.
Can you bake this as a bread loaf? What would the time be?
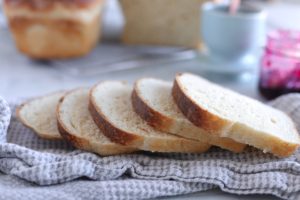
This recipe is meant to be baked in the dutch oven. If you want to make bread in a loaf pan try my Natural Yeast Sandwich Bread recipe. I think you’ll love it! https://amberskitchencooks.com/natural-yeast-sandwich-bread/
I’m new to making sourdough (since June 2023) and I think I’m finally getting the hang of the process and turning out beautiful loaves. One question I have is — what is good timing for starting the process so I’m not up late at night to get cold proof? I’d appreciate any tips on this!
Hi Cheri, the cold proof can last for 4-72 hours, so bake it when it is convenient for you!
This is my all time go to sourdough bread recipe. Whenever anyone wants to learn I teach them this one. It comes out perfectly! Thank you Amber!!
I missed the bulk ferment rising on the counter. The bread still turned out great. Why do we need to do the bulk ferment, what is the benefit? I won’t miss it again.
Hi Tanya, good question. The bulk ferment just helps break down the flour, it will still ferment during cold ferment and will end up fine!
I bought the Dutch oven you had linked in the article but just realized it says up to 400 degrees. Is it indeed the one you use and will the 450 degree heat be ok??
Thank you
I routinely use it at 450, but do what you feel comfortable with!
Love the bread recipe! My bread comes out with a hard crust. How can I soften it?! What am I doing wrong? Thank you!
Hi Tawny, this recipe is for a crusty Dutch oven loaf. If you want a softer loaf, I suggest making any of my sandwich bread recipes. This is one of my favorites: https://amberskitchencooks.com/natural-yeast-sandwich-bread/. Let me know if you try it!
Finally, fantastic results. I’ve struggled to get this just right, and the meticulous details you have provided here made the difference! Especially, the power feed and points about getting my refrigerated starter back up to metabolic speed.
FWIW, I use organic rye and dechlorinated water for my starter care and sponge. Also, I proof not in Banneton, but parchment paper in a stainless bowl, the same shape as my Dutch oven. When it’s time to bake, I score then lift it right into the Dutch oven, avoiding the flip, which tends to deflate my loaves too much. I’ve been baking at 475° in convection oven. Super crust, substantial, and perfect crumb, just how we like it.
Thank you very much, Chef!!
Great recipe! I have been making it weekly for my family since I found you. Thank you!
I am not sure what you mean when you say:
“open the lid and using the corners of the parchment paper, lift the dough into Dutch oven and put the lid back on.”
That sounds like you leave the parchment paper in the dutch oven. Is that correct?
Thanks!
Yes that’s exactly right!
Quick question. Have you ever double the recipe and made just one large loaf? If so, would I just double the cook time?
Hi Jahyme, I would not recommend making one large loaf. I would stick to making two loaves. It probably wouldn’t fit in your Dutch oven anyway! Let me know how this turned out for you!
My very first time making sourdough…. I used this recipe & followed it exactly. The bread was AMAZING!
I bake a lot of bread, and my family all said this was the BEST bread I’ve ever made! Thank you, Amber! 5 very enthusiastic stars ⭐️⭐️⭐️⭐️⭐️
Love this recipe!. It does take a lot of time, but I keep coming back to it because the results are so great! Thank you Amber👍💕
I love this recipe! Answer makes sourdough so easy and do-able even for someone like me who has never baked successfully. It tastes amazing!
That makes me so happy to hear!
Hi Amber,
I am enjoying making bread following your recipes and advice!!! I want to make a dutch oven loaf but don’t have a scale. Do you have the recipe measurements in standard measurement of cups and tablespoons??
Thankful for YOU!,
BettyAnn
Hi Betty Ann, for sourdough I highly recommend getting a scale! It is much more accurate. This one is my favorite. https://www.amazon.com/dp/B06X9NQ8GX?linkCode=ssc&tag=onamzamberegg-20&creativeASIN=B06X9NQ8GX&asc_item-id=amzn1.ideas.3ILBH9HLGLC9&ref_=aip_sf_list_spv_ofs_mixed_d_asin
love this recipe. I wish printing it was not 4 pages long. The title starts low on the page and then 4 pages for one recipe. Seems wasteful. Thanks for the yummy recipes
Do you have to use bread flour for this recipe?
Hi Ellie, I highly recommend using bread flour. However, you can try it with all-purpose flour and see how it goes.
You mentioned it is important to have a strong starter. How do you do that?
Hi Judy, having a strong starter will ensure better rise. You can find all of my tips for caring for your sourdough starter here: https://amberskitchencooks.com/how-to-care-for-your-sourdough-starter/
My dough has been sticky and wet but has made great sourdough. I tried experimenting with the water and reduced to 69% hydration, however same amount of starter and I fear it’s too much starter? It’s really wet. This is before my first stretch and fold. I’m afraid I need to restart.
Hi Stephanie, how did it turn out?
Actually turned out not bad! It tasted really good at least!
This is my go to sourdough recipe. I started last fall and haven’t quit. Love Amber’s specific instructions. I’ve passed this recipe and method onto all my friends.
I recently started making sourdough bread and this recipe and its explanations really clarified a lot of questions and uncertainties I’ve experienced about the process. Thank you for such good details on what each step should entail, your trouble shooting guide, and still managing to make it easy to follow.
Thank you Katie– that means so much to hear!
I am a complete beginner to the world of sour dough bread baking. I have used this recipe three times and all three loaves were exceptional! I’m hooked! I know there are easier ways to make sourdough bread, but I like this old fashioned one that doesn’t use added baker’s yeast. My first loaf was made with all white bread flour, my second loaf with 1/2 whole wheat and my third load with 1/2 whole wheat. Thank you!
Thanks for the kind comment Cinda!
Such a great recipe. Easy to follow and turns out for me every time. No need to try any other recipe!
Thanks so much Lauren!
This recipe is amazing! I tried making the sourdough bread in my Dutch oven, and the crust came out perfectly crispy while the inside was so soft and airy. Thanks for sharing such detailed instructions; I can’t wait to experiment with different flavors!
Thanks so much Jaya, that means a lot!
I love the simple ingredients, but both recipes I have attempted your flour calculations are so far off. I had to add massive amounts of flour to this just so it wasn’t runny. I am crossing my fingers that the 2 recipes turn out. I used a lot of good flour and time and starter to do this. I will come back with my results.
Hi Lisa, how did it turn out? You may need to adjust the amount of flour depending on how runny your starter is.
You can use all-purpose flour, but I like the texture better with bread flour! And yes you can do the ice cubes trick with this recipe as well. Let me know how it goes!
I love this recipe! I’ve made it many times and it’s worked out so great and my loaves have been beautiful and delicious. But last time they stuck terribly to the parchment paper. No idea why. Any suggestions?
Sometimes it sticks if you don’t remove the parchment paper from the loaf as it is cooking. Could that have been the case?