Published Date: April 9, 2025 | Last Updated: January 26, 2026
No stretch and folds. No laminating. No bulk fermenting for x amount of hours. No cold proof. No banneton basket. No shower caps. JUST DELICIOUS SOURDOUGH! My Easy Dutch Oven Sourdough Bread is the perfect low-effort sourdough bread recipe with maximum payoff.
This post contains affiliate links and I may receive a commission on your purchase. Thank you for shopping through my links.
No stretch and folds. No laminating. No bulk fermenting for x amount of hours. No cold proof. No banneton basket. No shower caps. JUST DELICIOUS SOURDOUGH! My Easy Dutch Oven Sourdough Bread is the perfect low-effort sourdough bread recipe with maximum payoff.
I developed this recipe to be unfussy, so simple to make, and still taste amazing! I believe that sourdough should be accessible for everyone, and shouldn’t take a million hours and a dictionary to follow a recipe. This is a massive shortcut from my original Crusty Dutch Oven Sourdough recipe and it produces such amazing results and so I do this method a lot.
Just simply
1- combine the ingredients,
2- give it a light mix
3- cover it
4- leave it at room temperature for 8-12 hours
5- form the dough
6- let it rest one more hour, covered
7- bake it
8- eat it! 🥖
How to Make Easy Dutch Oven Sourdough
This recipe truly is simple. But I will do my best to explain the steps thoroughly so that you can make the best bread possible!
Mix
Mix all of the ingredients together in a bowl. You can knead it lightly, just until the ingredients are all incorporated.
Cover and Let Rise
Cover the dough and let rise for about 8-12 hours. If I am making this recipe during the day and I happen to be home, I will occasionally do some stretch and folds. But often I don’t and it still turns out great.
Shape
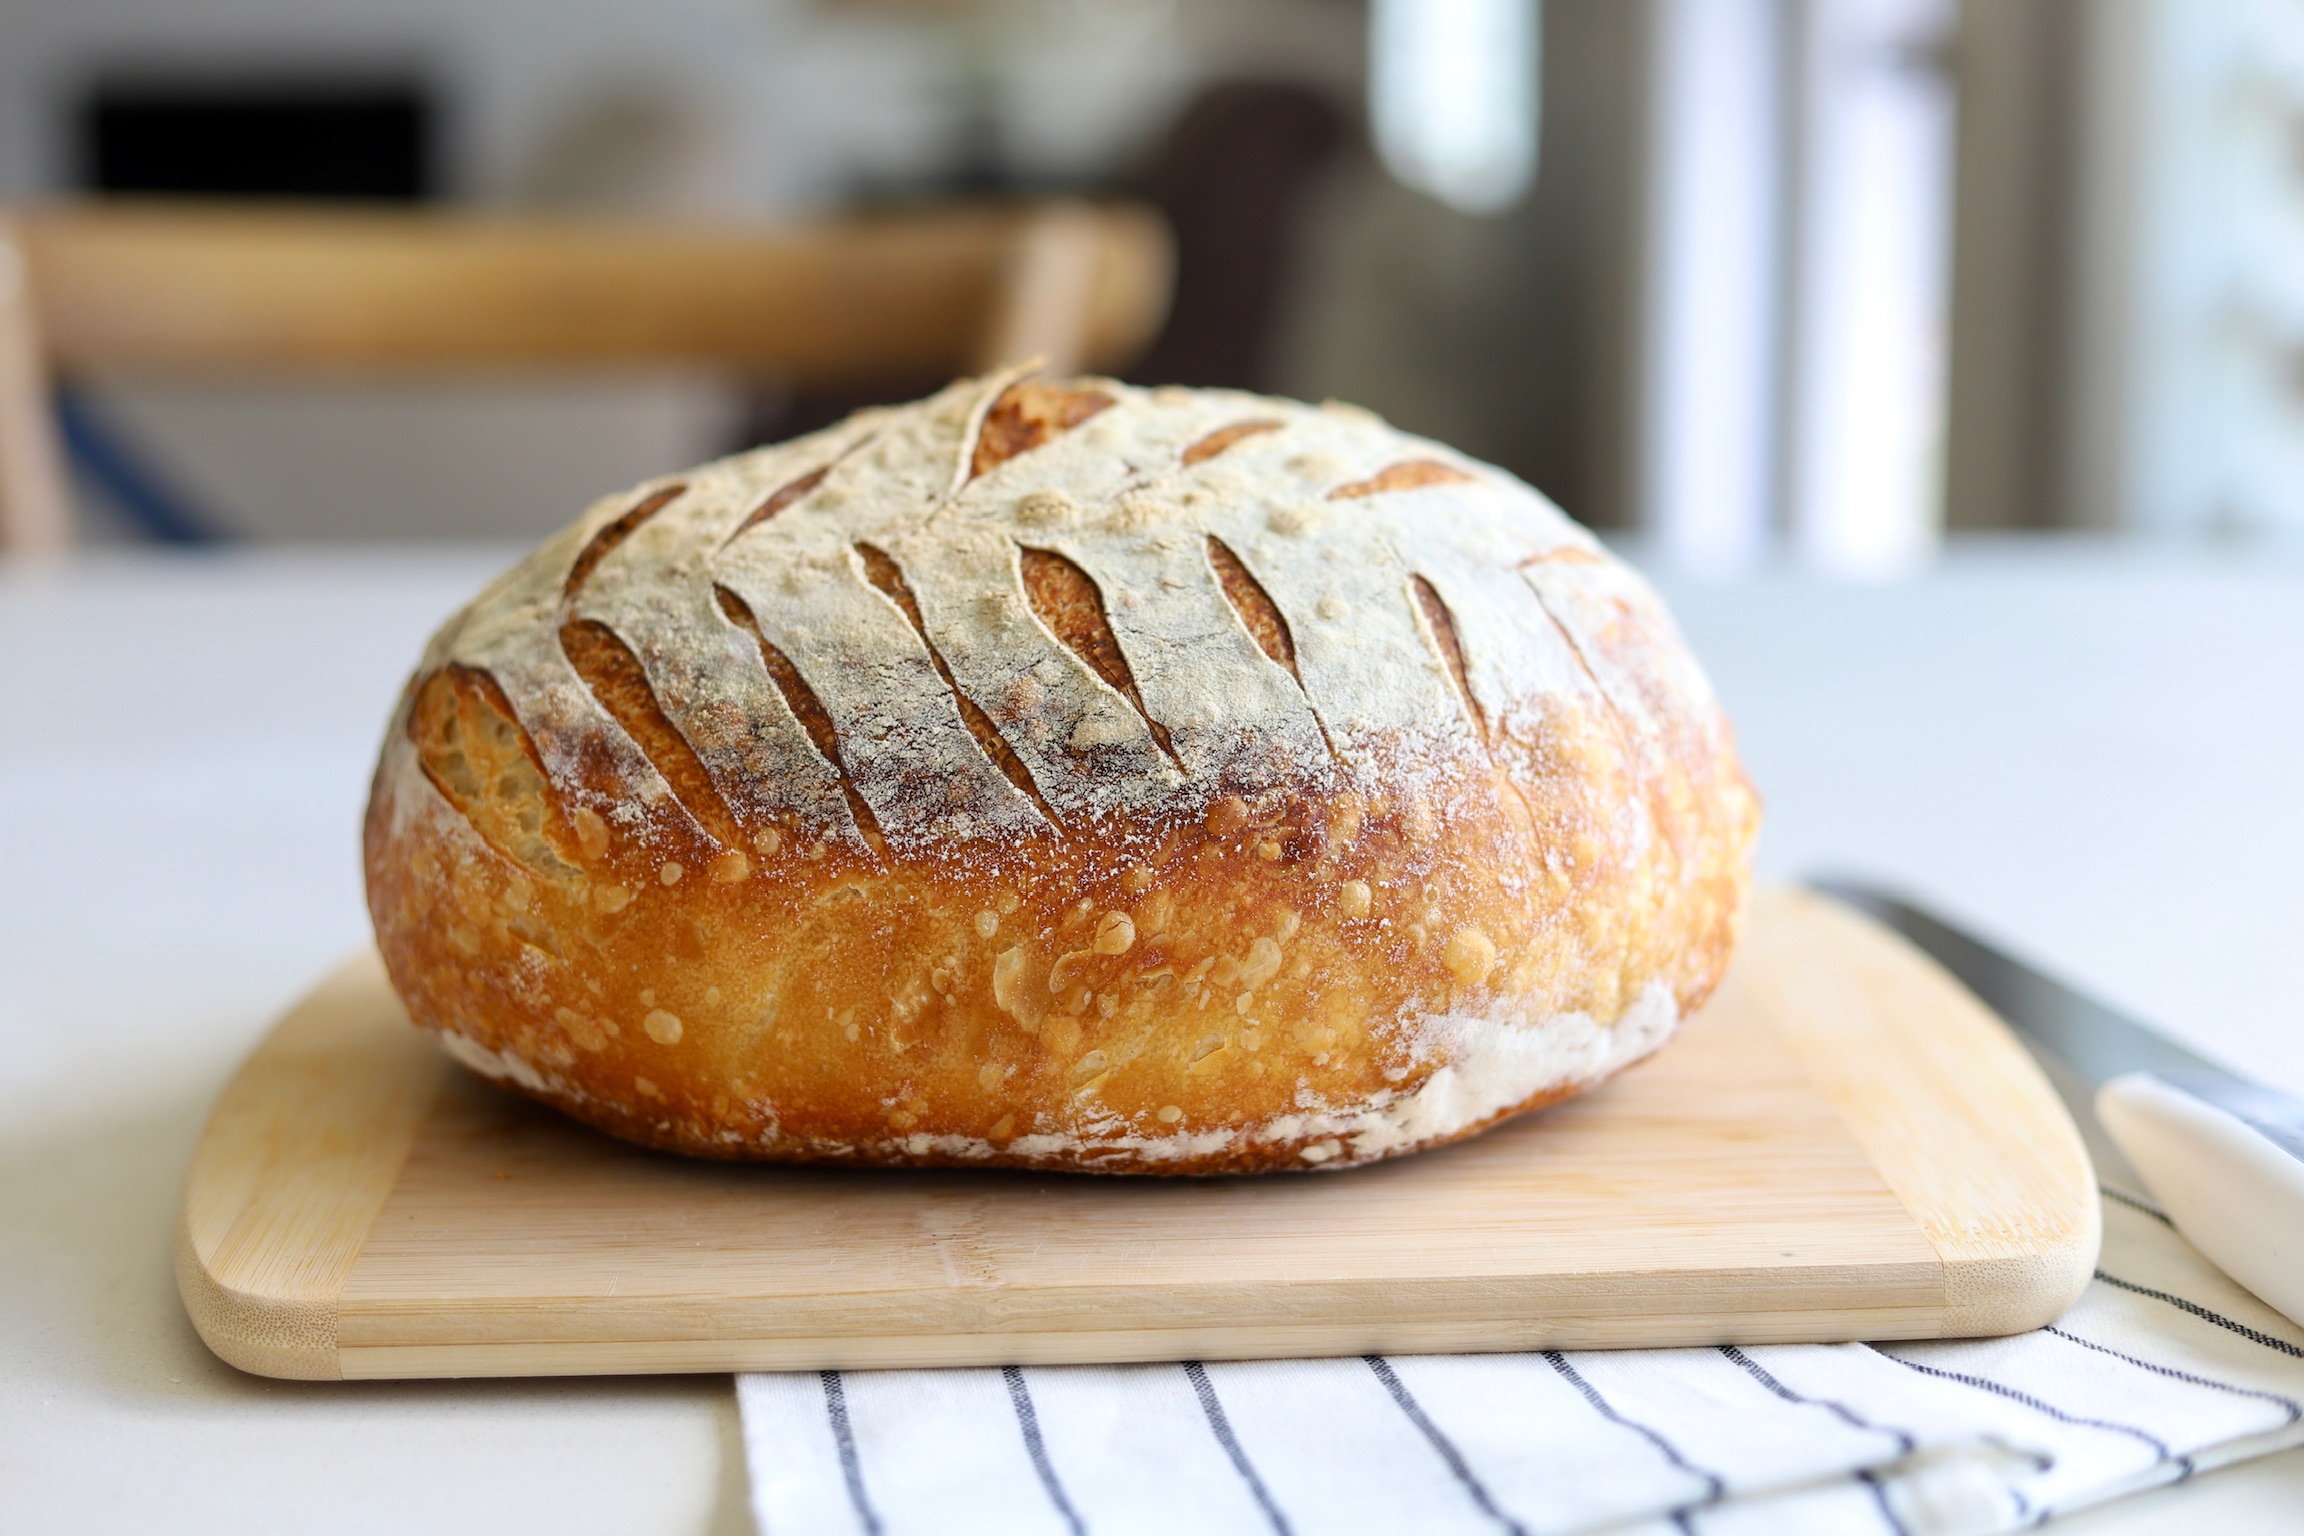
To shape the dough, flatten with your hands until it’s about 1/2 to 1 inch thick. If adding inclusions, sprinkle them on now. Fold 1/3 of the dough in towards center, then the other 1/3 in on top of that. Then, roll up the dough into an awkward ball shape. Cup your hands around the dough and slide and “bench pull” to create surface tension. Slide and pull, tucking the dough underneath until it’s a uniformly smooth ball. You can watch me do this here.
Rest
Put the dough on top of some parchment paper and cover with an upside-down bowl. Let it rest for one hour while the Dutch oven is preheating.
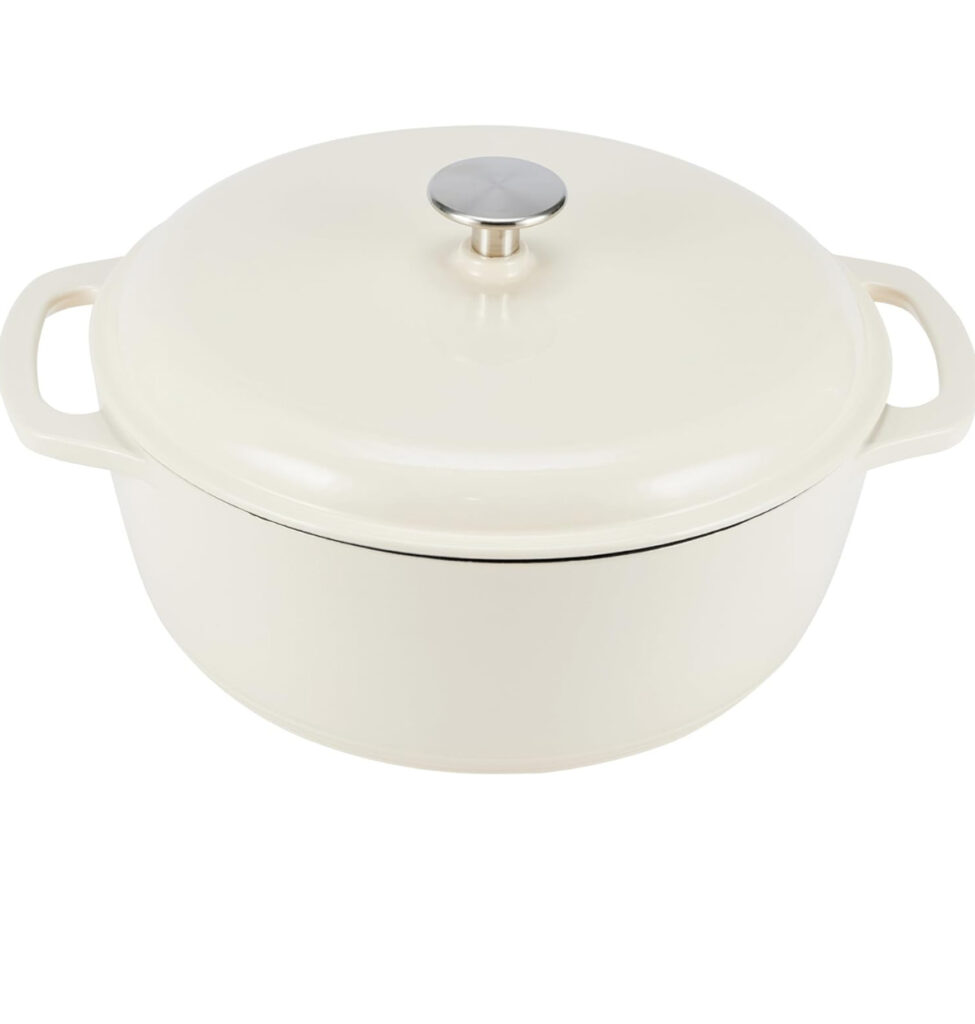
Preheat the oven to 450 ºF and put the Dutch oven inside so it can get nice and hot. I always place the Dutch oven on top of a pizza stone or a cookie sheet so that the bottom doesn’t get too crusty and hard. Just put the Dutch oven directly on top of the baking pan.
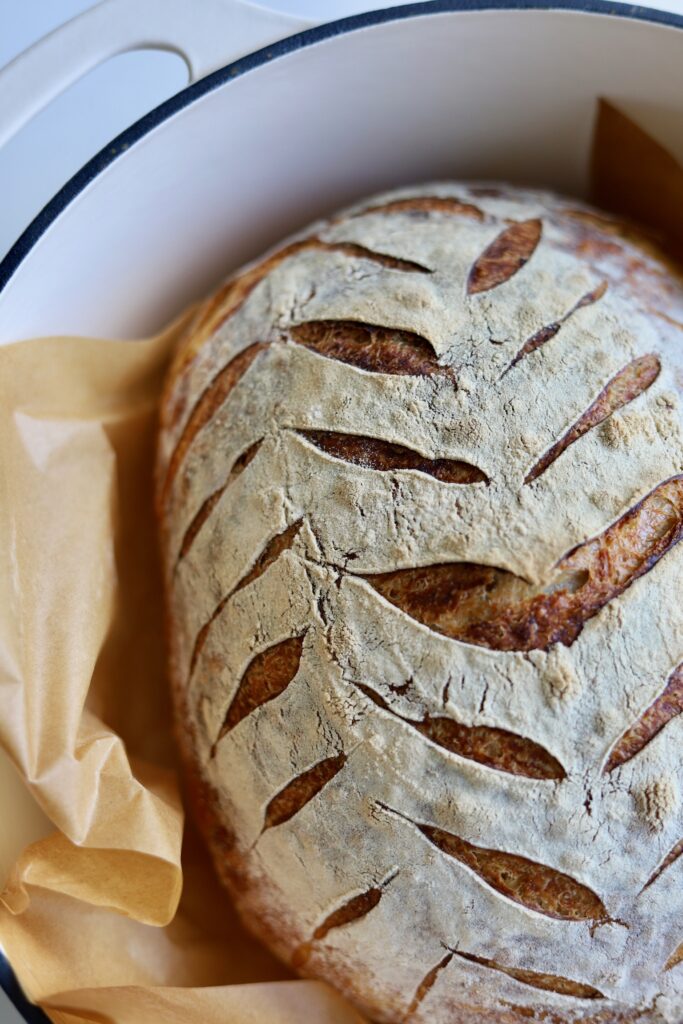
Score and Bake
Dust the dough with flour and score to your liking. Transfer the dough along with the parchment paper to your hot Dutch oven.
Cover with the lid and put in oven. I like to place my Dutch oven on top of a pizza stone or cookie sheet to keep the bottom of the bread from browning too much.
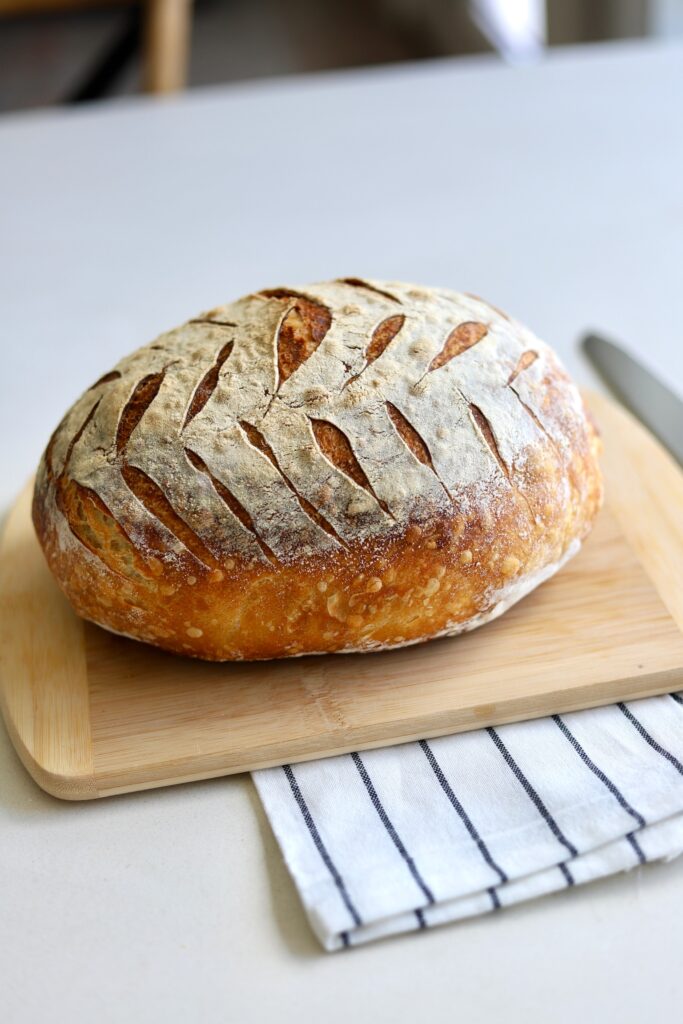
Reduce the heat to 400℉ and bake, covered for 40 minutes. Remove lid and let the crust golden for 3-5 more minutes.
I bake this at a lower temperature than my standard method because the dough is at room temperature to start with. Not at fridge temperature like some of my recipes that require a cold proof.
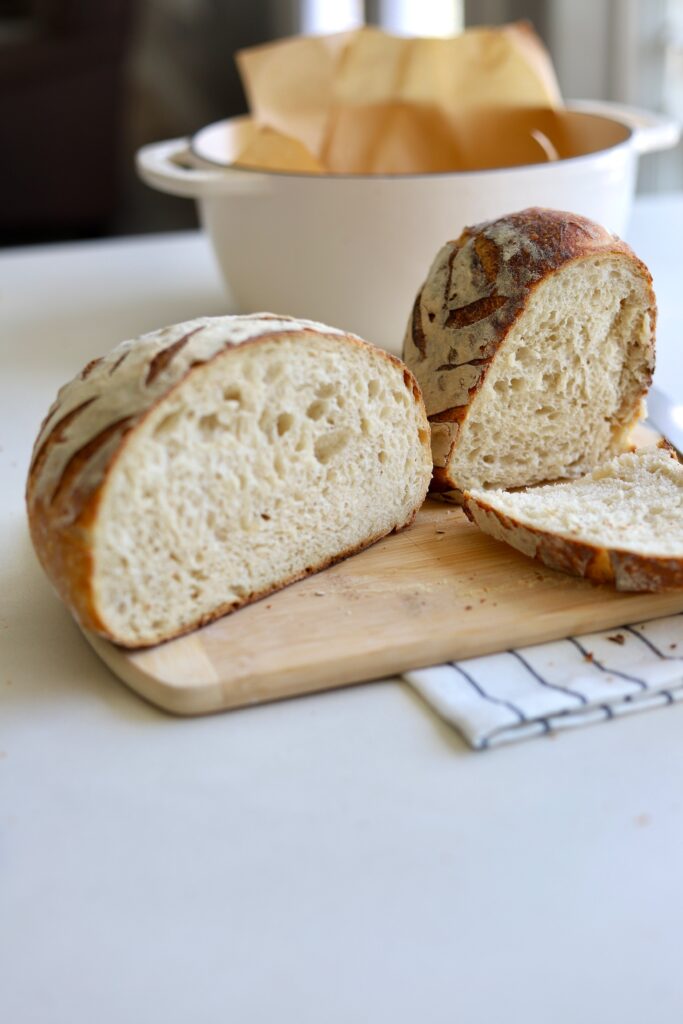
Remove bread from oven and put it on a cooling rack. Let it cool for one hour before slicing into it.

What Supplies Do I Need?
I get a lot of questions about what supplies you need to start making sourdough. There are a lot of things that you can buy, but to start out, really all you need is a few things:

There are a lot of things that make the process easier, like a mixer, bread lame and a banneton basket. You can find all of my sourdough supplies here.
Ingredients for Easy Dutch Oven Sourdough
Sourdough Starter
I most often make this recipe with DISCARD (unfed, flat and runny starter) instead of active, fed and bubbly starter. And it turns out every bit as good!! I use the same weight measurements of discard as I would with fed bubbly starter.
I always thought that was a giant no-no, but I am realizing that sourdough is a much less rigid process that I used to think. If you are confident in the strength of your starter, you can use unfed, runny discard instead of fed, bubbly, active starter! But do it at your own risk and don’t get mad at me if it doesn’t work, please 🙂
You can use either active starter or discard starter. If you’re not super confident in the strength of your starter, you can totally activate as you normally would and it will turn out amazing.
If you don’t have a starter, you have a few options:
- Get a starter from a friend
- Make your own starter (this will take anywhere from 10-20 days. I have a highlight on the whole process here!)
- Make my Easy Dutch Oven Bread with commercial yeast
Salt
I am very picky about Salt! I only use Redmond Real Salt because it is full of naturally-occurring trace minerals, is unprocessed, and has no fillers, no anti-caking agents, no additives, or unhealthy pollutants. Redmond real salt has been mined from an ancient sea bed in central Utah- making it true sea salt! I get my salt HERE. To make it more cost effective, I buy in bulk and order a 25 POUND BAG OF SALT* every few years. I store it in mason jars and it lasts me a few years. My affiliate Coupon code AMBERSKITCHEN saves you 15% on any Redmond products.
Flour
I always use bread flour in my bread recipes. Bread flour has a higher protein content and creates that delicious chewy texture that is so important to a delicious sourdough loaf. I usually get my bread flour from a local mill here in Utah, Lehi Mills. You can order their flour online and have it shipped to your house too! Use my affiliate code AMBERSKITCHEN for 10% off.
FAQs
Can I double this Easy Dutch Oven Sourdough recipe?
This recipe can be doubled. If you happen to have two Dutch ovens, you can also bake the two loaves at the same time. I just divide the dough in half right after the bulk rise. I lightly flour a clean countertop to form the bread, and when formed, I then bake both loaves at the same time in two, 6-quart dutch ovens side by side in my oven.
Can I use all-purpose flour instead of bread flour?
You can definitely use all-purpose flour, but it will make the dough more wet. So you’ll likely need to add a bit more flour. Start with 25 grams or so and check from there.
How long should I proof the bread?
How long you proof your bread depends on a lot of factors: the strength of your starter, the temperature of your kitchen, and your elevation. So I can’t give you a definite timeline, but the general guideline is 8 to 12 hours. The dough should double in size, so watch for that to happen. I always like to err on the side of 8 hours Vs. 12 because that’s really all the dough needs, especially in warmer months. But sometimes, it’s not gonna happen that soon so I make it work with 12 hours.
Can I do a cold proof?
You can absolutely still do a cold proof using this method. There are a couple of ways to do this:
Option one; After the first bulk rise, you can form the dough into a tight ball and transfer it to a lightly floured banneton basket covered with a shower cap. It can stay in the fridge Iike this anywhere from 1 hour to 72 hours. When you are ready to bake with the dough, preheat your Dutch oven, and when it is hot and ready to go, take the dough out of the fridge, remove the shower cap, and place a piece of parchment paper on the top of the dough. With your hand holding the parchment paper in place, gently flip it upside down so the parchment paper is underneath the could round of dough, then lift the banneton basket off the top. Score and transfer to the Dutch ovens immediately. The cold dough does not need to come to room temp. You will notice that it is easier to score cold dough than room temperature dough. Bake like normal.
Or, option two; after the first bulk rise, transfer the dough to an airtight container and put it into the fridge. It can be refrigerated from 1 to 72 hours. When you are ready to bake with it remove it from the fridge, form it while cold, set it on a piece of parchment paper with a bowl upside down over the top so it doesn’t dry out. You probably want to give it about two to four hours from the time it comes out of the fridge until it is baked just to give it a little rise after being formed. Preheat your Dutch oven and when the dough is ready to bake, score it and transfer it to the hot Dutch oven and bake as normal.
My dough is really wet. What do I do?
If your dough is very wet after mixing, you may want to add more flour. The amount of flour that you need depends on lots of things, including the hydration of your starter and the humidity in your kitchen. So you may need to add more or less flour than I have added here. Your dough should be tacky but not overly sticky.
If your dough is still very wet after your bulk ferment, your dough may have over fermented. If that is the case, it’s ok to sprinkle on and knead in some additional flour to get the texture right. It should hold its shape when formed. If it’s extraordinarily sticky and not holding its shape (even after the bulk rise) then it’s going to bake flat. Sprinkle on some flour and knead a little until the dough is still tacky but not excessively sticky.
My bread turned out gummy. What went wrong?
Dense and gummy suggests that the starter didn’t rise the bread. This could have been for several reasons.
- Was your starter robust and healthy or more on the dormant side? Powerfeeds help solve those issues.
- The dough could have simply overproofed which is a risk with this method because it is such a long overnight rise. Simply means the yeast could have run out of food.
- It could have been underproofed. Either your kitchen was too cold, you didn’t let it proof long enough, or your starter wasn’t very strong.
Can I freeze this Easy Dutch Oven Sourdough bread?
I would not recommend freezing the dough before it is baked. You can definitely store the bread in the freezer after it is baked and cooled. I’d recommend freezing the bread if you’re not planning on eating it within a couple of days.
How do I thaw this bread?
Take the bread out of the freezer and run it under water for a second or two, just enough to get the outside of the bread a little wet. Then put it in the oven for about 5-10 minutes at 400 F, or until it is thawed and the crust is nice and crispy again.
Can I add mix-ins to the dough?
You can add mix-ins if you would like to. I like to add parmesan cheese and rosemary for a yummy savory loaf, but also love the combinations of jalapeño and cheddar, or cinnamon and sugar as well. Sprinkle your mix-ins right after you flatten the dough before you fold it in thirds and make into a ball. You can watch me do this here.
How do I care for my sourdough starter?
Lucky for you, I have a whole blog post about how to care for your sourdough starter!
Do I need to preheat my Dutch oven?
For best results, I recommend pre-heating your Dutch oven. This is really the easiest way to get that amazing crusty exterior that we all love so much. I love this enameled Dutch oven from Amazon!
More Bread Recipes
Natural Yeast Sourdough Sandwich Bread
HAPPY COOKING!
I hope you love this Easy Dutch Oven Sourdough recipe as much as I do. If you want to follow along on my cooking adventures, follow me on Instagram @AMBERSKITCHEN
Easy Dutch Oven Sourdough
The most delicious sourdough bread in just a few simple steps!
Print
Pin
Rate
Equipment
- dutch oven
Ingredients
- 125 g sourdough starter (½ cup) see notes for more info
- 12 g salt (2 tsp)
- 350 g water (1½ cups)
- 500 g flour (4 cups)
Instructions
- In a bowl, combine water, starter and salt. Mix. Then add the flour and mix together just barely until there are no dry spots in the dough. (Don’t knead it)
- Cover dough with a lid, and let dough sit at room temperature for 8-12 hours or overnight.
- Preheat a Dutch oven inside your oven at 450 degrees for 30-60 minutes. (I recommend putting a pizza stone or baking sheet under the Dutch oven so the bottom of the bread doesn’t get too crusty & overcooked)
- Right after you preheat the oven, dump dough out onto a clean, and lightly floured surface. Tuck, stretch, or roll the dough into a smooth ball. Pushing and pulling the dough in a circular motion helps it get into shape. (As shown in video).
- Transfer dough ball to a piece of parchment paper, and cover with the upside-down bowl used to make the dough.
- Let it rest one hour.
- Remove bowl covering and lightly dust dough with flour. Using a sharp blade or knife, score the dough so the steam has somewhere to escape. Scoring also helps give the dough a direction to rise.
- Transfer parchment of dough into a hot Dutch oven. Cover with lid and put in oven.
- Reduce heat to 400℉ and bake, covered for 40 minutes. Remove lid and let the crust golden for 3-5 more minutes.
- Remove bread from oven and put it on a cooling rack. Let it cool for one hour before slicing into it. (Slicing into it while it’s warm makes the bread gummy)
Notes
You can use either active bubbly starter or unfed discard starter.
I most often make this recipe with DISCARD (unfed, flat and runny starter) instead of active, fed and bubbly starter. And it turns out every bit as good!! I use the same weight measurements of discard as I would with fed bubbly starter.
Measurements in cups: 1/2 cup sourdough starter, 2 tsp salt, 1 1/2 cups water, 4 cups flour

Absolutely perfect every time I make it! My family loves it!
Author
Thank you so much, Addison!
Can you give the recipe in units of volume instead of weight? I don’t have a scale.
Amber, can I make bread loafs w/ this same way and if so how would I do this? Also my family knows you simply as “the bread lady” 🙂
Author
Hi Dianna, you CAN! You can use this exact recipe bug form the dough into greased loaf pans. The only tricky part is allowing them to rise until doubled in size before baking. Then after they bake, remove them from the loaf pan quickly so they don’t condense and get soggy as they cool. You can also read through my sourdough sandwich bread recipe for more tips. 😊
Could I get recipe in amount measurements. I don’t have a scale. Thanks
Author
Hi Louise, I have the cup measurements for you: 1/2 cup sourdough starter, 2 tsp salt, 1 1/2 cups water, 4 cups flour. Let me know how it goes!
Author
Thank you Rachel!
Can you do add ins with this method?
Author
Yes! I do this all the time! You can watch this video to see my process: https://www.instagram.com/reel/C669zlev-Fa/?igsh=MXBoOXI4NDR2Zm1wcA%3D%3D
Can I use this recipe to make mini loaves?
Author
Hi Heather, absolutely! Although I don’t have a formal written tutorial on it. But I would probably make it into somewhere around 5 mini loaf pans and bake for somewhere between 25-30 minutes. Although you’ll want to keep an eye on them.
I have had my starter since November and have baked this recipe once a week from unfed starter from the refrigerator. This is the first time I have every made sourdough and the most challenging part was getting the starter right. I love this simple put together at night and bake in the morning recipe. My husband won’t buy store bought bread. Also! This bread makes the best grilled cheese sandwiches. Thank you for sharing also the video that I paid a lot of attention to in the beginning. Im really getting in the swing of it now.
Author
Thank you so much for your kind comment, Sarah! I am so happy that my recipe and video have helped you out on your sourdough journey.
Thanks to this easy and super delicious recipe, I make bread several times a week. And sometimes everyday and gift to neighbors.
Author
Thank you Sara! I bet you are the favorite neighbor! 🙂